Tuesday, 5 February 2013

Earl Grey, Lavender and Chocolate Chip Loaf Cake


This flavour combination seemed so right at the time of conception. 
I love Earl Grey tea, I love dark chocolate and I like lavender.  You would think combining them all would work great, with the slight citrus and tea hint from the Earl Grey working well with the dark chocolate, and the notes of floral aniseed from the lavender providing an interesting contrast. 
To be honest the former pairing, I think, would have worked very well, and initially that was what I intended to do for a long time, but in the process of finding a cake base for what was initially going to be the ‘Earl Grey and Dark Chocolate Chip Loaf Cake’, I came across this recipe called Lemon-Lavender Pound Cake.  When I saw the lavender I instantly thought ‘hmmmm sounds good, let’s add that in too’.
Sometimes less is more.  I really should have stuck with the initial concept because the cake was exceptionally lovely – so soft and full in the mouth.  A very satisfying cake that was brought down with just too many flavours that I thought could work together cohesively, but ended up sitting apart from each other completely. 
I’m talking specifically about the lavender.  I’ve cooked with lavender before where it was the sole flavour in some cupcakes I made about a year ago.  It worked really well on its own as the main flavour, but when it is paired with other flavours, lavender can become a bit of a problem.  I think it’s because the flavour of lavender is so unique, floral and prevalent that it risks drowning out all the other flavours rather than complementing them in any way.
I’m glad I only used 1 tbsp rather than the ⅓ cup specified in the recipe.  I think that would just have killed the cake completely!
I’m curious though about making the original recipe.  It looked so good in the picture that I’m wondering if that amount worked well because it was paired with the lemon (a flavour that can hold it own).  I’ve seen this pairing before so maybe the lemon provides enough of a contrast to be able to take such a hit of lavender.  Will need to try that out sometime.
Baked in the 7" round cake tin
This batter made a lot of cake with the recipe giving enough for two loaf tins.  I used a 2lb loaf tin and 7” round cake tin and I wouldn’t use anything smaller than that.
Like I mentioned the cake itself was fantastic.  A soft but sturdy cake with a rich flavour (from all that butter no doubt!) and delicious thick crust.  I will give the recipe as I made it but please think about omitting the lavender completely or drastically reducing it further – maybe to about a ¼ tsp.
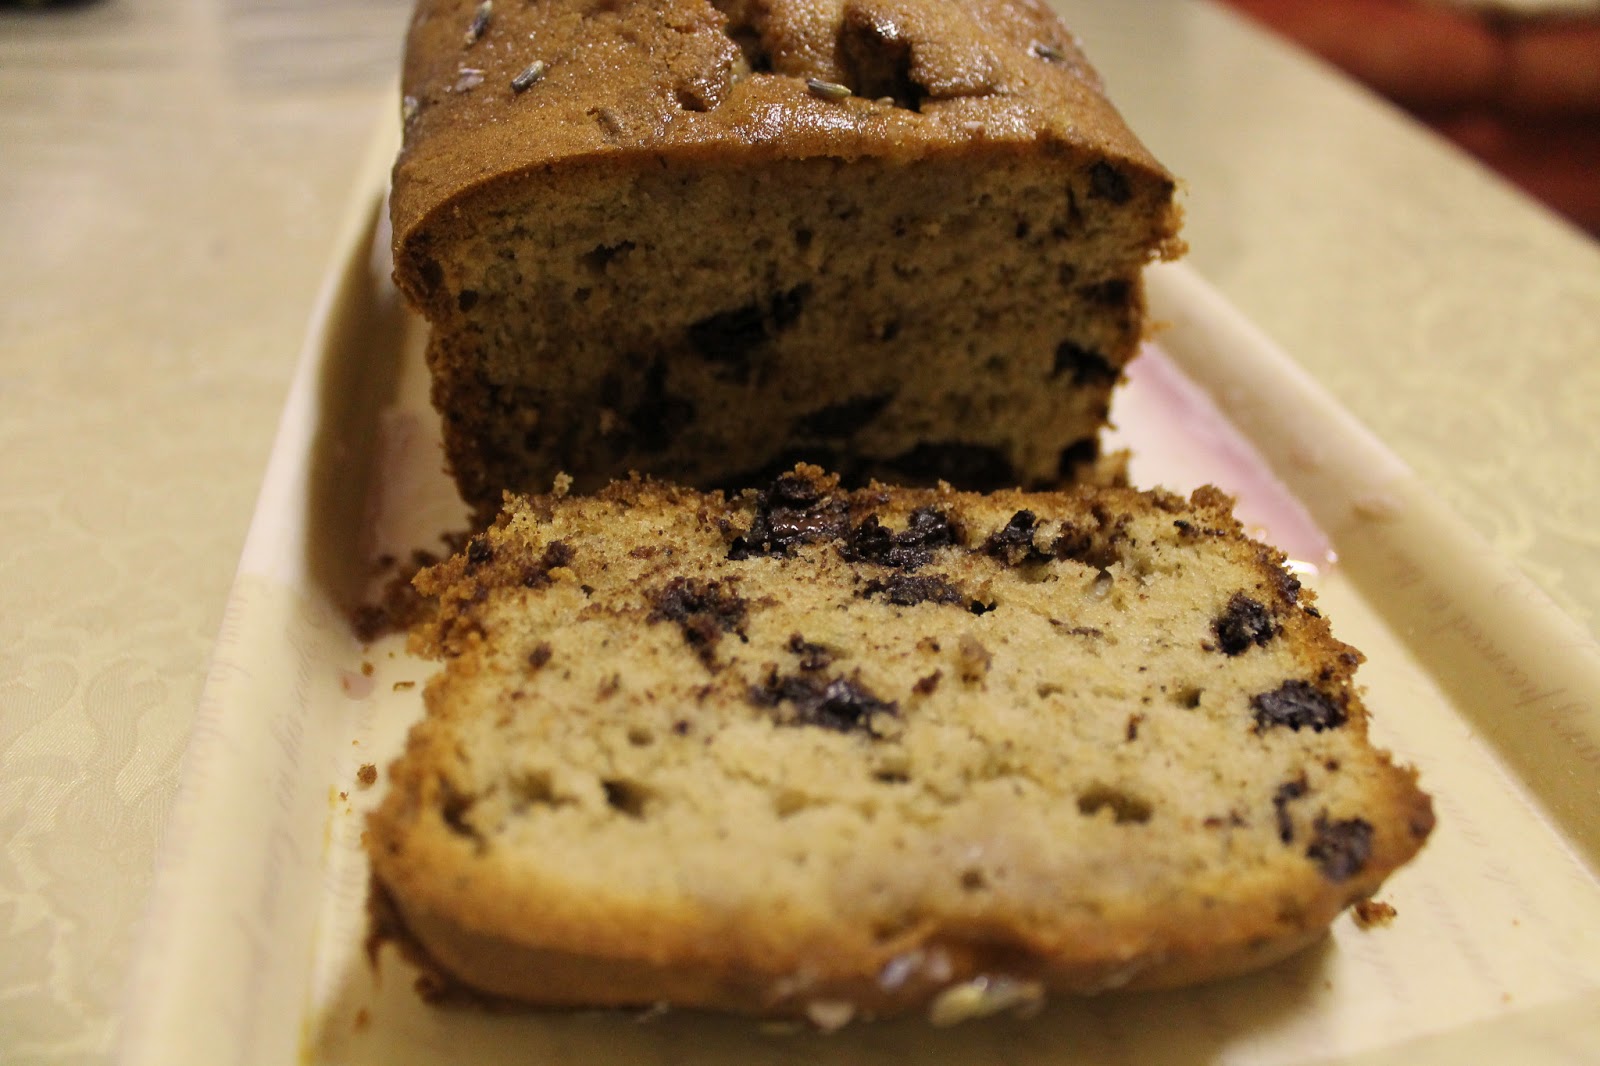
I have to mention though that this cake really improved in flavour by the second day.  I don’t know how it did that but it just did.  The lavender just didn’t seem as overwhelming when I tasted it the next day and the cake was just as soft and scrummy.  Maybe it had something to do with the fact that it had cooled down a lot?  I’m not sure but I liked it much more and so did the family.  So maybe this just needs time to develop its flavours and you might want to give it a try with the lavender.

Earl Grey, Lavender and Chocolate Chip Loaf Cake (adapted from Desserts for Breakfast)

·         100ml milk infused with 3 teabags of Earl Grey Tea (preferably overnight)
·         6 large eggs
·         1 tsp vanilla paste
·         450g plain flour
·         300g caster sugar
·         2 tsp baking powder
·         ¼ tsp salt
·         1 teabag Earl Grey Tea cut open and contents used only
·         375g butter, very soft
·         125g dark chocolate (60%), chopped small (or chocolate chips if you have them)
·         1 tbsp lavender (seriously optional but worth it on the second day)

Preheat oven to 180C, prepare two loaf tins.  Combine milk, eggs and vanilla paste together in a measuring jug.
Combine the flour, sugar, baking powder, salt and the loose Earl Grey from the teabag and whisk carefully until mixed well.
Add the softened butter to the flour mixture and beat until the mixture becomes lighter and creamy.
Add the milk mixture gradually to the flour/butter mixture, whisking thoroughly after each addition.
Using a spatula, mix in the lavender and chocolate, trying not to over mix now that the flour has been incorporated.
Divide the batter into the two loaf tins and bake for about 30 minutes then add a foil cap on top of each loaf to prevent them from browning too much.  I baked mine for an additional 25 minutes before they both passed the skewer test.

Saturday, 2 February 2013

Dundee Cake – Alcohol Free Fruitcake


I wanted this to be the first recipe of my blog.  Back when I was thinking of starting one, I had numerous ideas about which cake recipe I was going to make for my first post.  Extravagant layer cakes were the first option as they had the showstopper appeal.  Then I thought about this Dundee cake as it would be a homage to my city.  I also like fruitcake more than most people.  In the end I decided on my Date, Orange and Pumpkin cake as my first post because those were the ingredients I had at the time and that pretty much describes how I bake most of the time – with what I have to hand, with what is seasonal and with what is easy to acquire for me.  It was also an own recipe and felt it would show how I liked to work with ingredients.
I didn’t forget about the Dundee Cake though and when one of my sister-in-laws requested fruitcake once more (her favourite type of cake) I felt it was the perfect time to make this.
This is the River Cottage recipe I found online and one I felt most comfortable with.  I did of course modify it somewhat – I didn’t have any ground almonds so substituted 100g of spelt flour for 125g ground almonds.  I also omitted the rum and used orange juice.
A Dundee Cake is basically a Christmas style fruitcake with the emphasis on oranges and almonds.  It is also traditionally decorated with blanched almonds on top of the cake and utilises marmalade in the cake batter.  It turns out be much lighter than traditional fruitcakes with a more crumbly texture.  It shouldn’t really contain glace cherries although I have seen some versions containing it online.
For my interpretation of the cake I wanted to really highlight the orange flavour and the almonds.  For your 500g of dried fruit you technically add what you like; sultanas, raisins, dried apricots, even prunes and dates.  But I stuck to golden sultanas and flaked almonds and made up my 500g with these ingredients only.   
For fruitcake I always soak the dried fruit in orange juice and just love the way they plump up over night.  Having absorbed all the liquid they’re like little squishy bursts of orange sweetness when you bite into them.  As well as the juice I added the zest to the batter as well which I felt made a difference.
Although the recipe specified to soak the dried fruit in 75mls of rum, I increased the amount of orange juice to about 100ml (which was how much came out of one orange – it was a particularly large orange).  All of this got absorbed overnight by the dried fruit so just before adding the fruit to the cake batter I added the juice of another orange (about 70-80ml).  Due to the large amount of flour in this recipe I took the chance that the extra liquid will be ok and it was.  You get a nice hit of orange with this cake.
This cake is a lovely light orange flavoured fruitcake that has a beautiful sturdy but soft texture and a surprisingly moreish flavour.

Dundee Cake adapted from Cakes (River Cottage Handbook)

·         500g golden sultanas and flaked almonds
·         170ml orange juice to soak the dried fruit in
·         zest of 2 oranges
·         250g unsalted butter, softened
·         250g light soft brown sugar
·         5 eggs
·         275g plain flour
·         100g spelt flour
·         1 ½ tsp baking powder
·         Pinch of sea salt
·         2 tbsp orange marmalade
·         75g whole blanched almonds

Soak the sultanas in 100ml of orange juice overnight so that all the liquid is absorbed.  When you come to make the cake, add in about 70ml more orange juice.

Preheat oven to 175C gas3, prepare a 9” round cake tin.  Combine the flours, baking powder and salt in a medium bowl.

In a large bowl, beat the butter and the sugar until light and creamy.  Add the eggs, adding 1 tbsp of the flour mix with each to prevent it from curdling.  Beat the egg thoroughly before adding the next one.

Fold in the flour mixture until fully incorporated.  Mix the marmalade into the dried fruit and fold this in along with the flaked almonds. 

Spoon the mixture into the prepared tin, spreading it out evenly with the back of the spoon.  Decorate the top with the blanched almonds placed in concentric circles (I find it easier to start from the middle and work my way out).

Bake in the oven for about 1 ½ hours until a skewer inserted in the centre comes out clean (my cake took 1 hour 40 minutes in total).  Check after 1 hour and, if the surface is getting too brown, lay a foil cap over the top.  Leave to cool in the tin before removing.

Tuesday, 29 January 2013

Mint, Yoghurt and Lime Bread


This is the first savoury recipe of the blog and it had to be bread.  I’ve been making bread for a while now but I’m not regular at it and still consider myself a beginner – I know bread recipes but I’m far from knowledgeable about all the techniques that go into making good bread.  Although I have the good intentions of baking bread regularly, sometimes I just get lazy and buy supermarket produce for a while.  Then I’ll make the resolution again to bake my own as much as possible because it is much healthier and doesn’t have additives and it’s better for the children and so on.
Truth is that fitting bread making into your day takes a bit of organisation.  It takes a while for it to become routine and you have to give it a chance if you want it to become a daily thing.  Sometimes I can manage it for a good while but so far I have always let go eventually.  I do come back to it though.  Because I really do enjoy making bread – maybe almost as much as making cakes.  But not quite.
I've decided to invest in some good bread books, something that can explain and show all the techniques as well as recipes, and currently have in my Amazon basket Bread (River Cottage Handbook No.3) by Daniel Stevens, Artisan Breads Everyday by Peter Reinhart, The Handmade Loaf by Dan Lepard, Tartine Bread by Chad Robertson, Local Breads by Daniel Leader, The Bread Bible by Rose Levy Beranbaum, Bread: A Baker’s Book of Techniques by Jeffrey Hamelman, English Bread and Yeast Cookery by Elizabeth David and The Tassajara Bread Book by Edward Espe Brown.  I think I will need to do a lot more research on them before deciding which ones to buy.
I feel that bread is almost as good a medium as cakes to experiment with flavours.  Probably even more so since you can really showcase the savoury as well as the sweet.  Although I do have to admit I find savoury bread far more appealing than sweet.
This bread was inspired by one of my favourite dips.  It consists of yoghurt, lime zest, lime juice, chopped mint and seasoned with salt.  Sometimes I add in grated cucumber for texture and sometimes toasted cumin for bite and sometimes both.  It’s very versatile and I love it with kebabs and in my family we make kebabs a lot, hence this is an oft made dip.  I thought the combination of mint, lime and yoghurt would translate well into bread so tried it out.
I didn’t use fresh mint because the crop growing in my parents’ garden has just wilted away in the cold weather here in Dundee (it’s been snowing!).  Instead I utilised Egyptian mint tea which I buy from my local tea and coffee shop.  The dried mint is much more potent than the fresh so it’s much easier to infuse the flavour into the bread.  Also, I wanted to incorporate the mint into the actual batter and thought this would work better in its dried form.
I baked this in a loaf tin rather than freeform which was a big mistake.  I always bake my bread freeform and I don’t know why I decided to use a loaf tin this time.  I think I wanted the end product to look good in pictures maybe – you know, look like a proper slice of bread.  Never again.  First of all I made the mistake of lining the tin with foil which ended up just getting completely stuck to the end product.  The very middle on one side didn’t quite bake through, although the rest was baked fine.  Also, the bottom part of the loaf (that which was in the tin) had a paler look to it than normal and I didn’t like it.  I never have these problems when I just bung a vaguely oval shaped dough onto a baking sheet, so it probably was the inexperience of working with the tin. 
But I made other silly mistakes as well, like not slashing the top of the loaf and forgetting to add the wheat bran and crushed dried mint topping which I wanted.  Bottom line was, I was rushed that day and trying to cook the family dinner while I also baked the bread.  This is why it’s good to be organised properly when attempting bread.
This tasted like the savoury dip it was modelled after.  I think the 2 tsp of salt I added was a bit too much so I’ve decreased this to 1 tsp in the recipe below (I wouldn’t add in more than 1 ½ tsp).  The bread is moist but sturdy and you really get the tang from the yoghurt coming through in each bite.  You feel the mint and lime rather than taste them outright, more like an aroma of the ingredients hitting you but then aroma does play such a vital part in the taste experience.  This is fantastic toasted and slathered with salted butter in the morning.

Mint, Yoghurt and Lime Bread

·         300ml water
·         1 tbsp dried loose mint
·         2 limes, zest
·         100ml Greek Yoghurt
·         2 limes, zest
·         1 ½ tsp fast action yeast
·         400g strong white flour
·         100g spelt flour
·         1 tsp sea salt
·         1 tbsp dried loose mint

Boil the water with 1 tbsp dried mint and the zest of two limes so the flavour infuses into the water – the longer you can leave it for the more it will infuse with the flavours.  Strain the water (discard the used mint and zest) and leave to cool.  Whisk the yoghurt into about 200ml of the infused water.  Add the zest of the remaining two limes to the wet mix.

Combine the flours, yeast, salt and dried mint together in a large bowl.  Pour the liquid ingredients into the dry and mix together to form a dough.  If you feel the dough is too stiff, add a little more of the retained water – the dough should be a little on the sticky side but not too difficult to handle.  Cover the bowl and leave for about 10-15 minutes.

Oil a worktop and start kneading the dough, pushing the dough away from you then pulling back.  The dough will be quite wet but do the best you can.  It will look and feel messy but will come together eventually becoming more elastic as you develop the gluten – you should feel a little difference in texture.  Knead for about 10 minutes.

Place the dough in an oiled bowl, spraying a little oil on top of the dough too.  Cover with clingfilm and place in the fridge overnight.

In the morning, turn the dough out from the bowl and knock it back gently, no need to be too vigorous.  Then knead it into the desired shape.  I usually go for a longish oval shape or a round and place the ‘seam’ side down when leaving it to prove (rise for the last time before placing it in the oven).  As I used a tin this time, I kneaded it as usual, then bringing the outsides in (sorry, it’s the best I can do to describe the process), I shaped this into a rectangle that would comfortably fit into my tin.  I placed the dough into the tin seam side down, covered it loosely with oiled clingfilm and left it to prove in a warmish place.  

As it was an exceptionally cold day in Scotland (-1°C) mines took over an hour to prove.  It doesn’t usually take that long.  You’ll need to judge the time on the prove yourself.  Basically what you’re looking for is the dough to rise to almost double its height – no more.  You can actually over prove the dough which is not good.  

Make sure the oven is preheated to at least 250C for a good 20 minutes before placing the loaf into the oven.  It’s important for the oven to be as warm as possible for your loaf to get a good rise and crust.  I baked mine for a little over 1 hour, decreasing the heat 190C after 25 minutes.  I suspect if you bake it free-form it won’t take as long, but it is important to keep an eye on it especially if it begins browning too much on the outside (in which case place some foil over it).  I would give it at least 40 minutes in the oven and then start checking to see if it’s done (it should sound hollow when you knock the bottom and it should also feel a lot lighter than when you put it in).

Leave to cool on a wire rack.